First world problems… the lighting in our master bedroom is too dim.

Indiana Jones theme music running 24x7
I feel a little like Indiana Jones, holding up a BIC lighter in a dark cave, knowing that the boogey man is just out sight. Maybe I should get a cowboy hat and theme music.
Dun-da-dun-dun, dun-da-dun!
I’d put a midi file here on autoplay, but I don’t think that would have the desired effect.
Ok, alternate plan: just turn on another lamp… that’s what we usually do. For some reason, Kelly doesn’t appreciate looping Indiana Jones theme music.
So coming in the bedroom is a two step process - Turn on the chandelier, then walk across the room to turn on a lamp. And more often than not, we just leave the lamp on. So, obviously, this needs some automation to save the Earth and 3 seconds of time.
Desired State
When the chandelier power and/or dimmer state is changed, the lamp power and dimmer state is updated to match.
Hardware Needed
- Z-Wave controller (I use a SmartThings hub)
- In-Wall Z-Wave Dimmer Switch
- Plug-in Z-Wave Dimmer
Software
- Hass.io
- Node-RED
For an explanation of the software, check out my previous post, Getting Started with Home Automation.
Node-RED flow
Now that we have all the pieces, let’s wire them together in Node-RED. My overall flow is pretty simple:
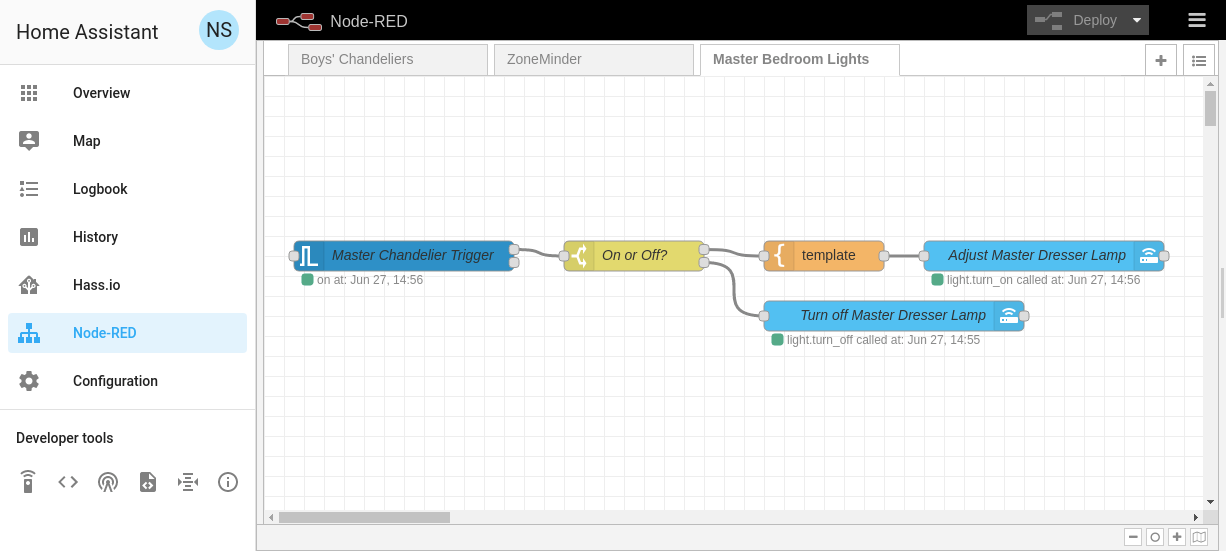
Master Bedroom Completed Flow
The flow starts on the left with a home assistant trigger. If you installed Node-RED using the HASS.io add-on, the home-assistant palate will be available. The trigger watches all events, looking for the Entity ID configured in the trigger.

Master Chandelier Trigger Properties
When the trigger fires, that means the state of the chandelier was potentially updated. First, I need to determine if the chandelier is currently on or off. Node-RED can determine this with a “switch” node. This is going to look at the message payload, which will have either “on” or “off”. Pretty simple:

Switch Properties
Next, let’s take the easier path of “off.” If the chandelier was just turned off, the only thing needed is to turn off the lamp. This is implemented as a “Service Call” node in Node-RED. We just need to tell it which Entity to turn_off:

turn_off service call
Now the “on” path. Because I’m using a dimmer, “on” also has a brightness factor. So I’m going to use a template to create a new message payload. The template is pretty short, creating a new message for the lamp that includes the brightness parameter that it received from the chandelier.
- { "data": {
- "entity_id": "light.master_dresser_lamp",
- "brightness": {{data.event.new_state.attributes.brightness}}
- }}
And here’s the populated template node:

template node
The last thing to do is to send this message back to Home Assistant via another Service Call node. I’m leaving the “Data” field blank, so Node-RED will automatically use the templated message from the previous step:

turn_on service call
Success
That’s it! Click the “Deploy” button at the top right, and watch in amazement as the lamp turns on and off with the chandelier!
The Indiana Jones hat and theme music is optional, but highly encouraged.